

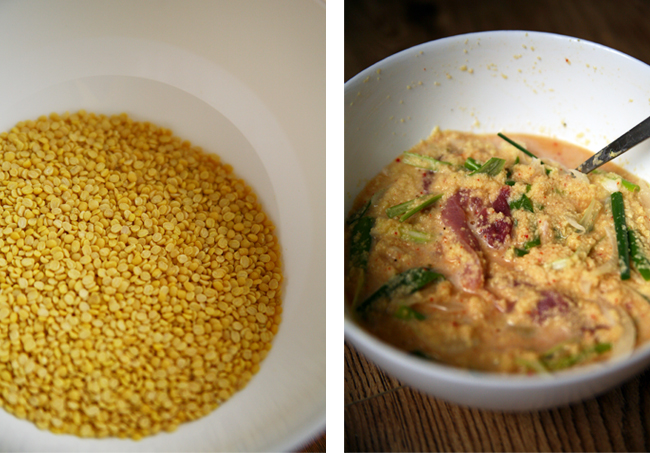
Moving forward with "Operation Eat My Pantry," I found half a bag of peeled, split, and dried yellow mung beans which instantly brought back memories of helping my mom fry up countless bin dae dduks the night before Chuseok dinner. While I had watched my mother make them numerous times throughout my childhood, I had never actually made them myself. Feeling very grown up, I decided it was high time that I have at it on my own.
One of my favorite places to go in Seoul, is this hole-in-the-wall bin dae dduk place called "Yul Cha Jip" that my parents have been going to since they started dating in college. It used to be located along this incredibly narrow alleyway near Gwanghamun that actually traced the original dirt roads taken by peasants back in the day as the main roads were only reserved for the "yangban" upper class. Sadly, these alleyways have recently succumbed to the unrelenting tread of commercial development but Yul Cha Jip has still managed to live on in a new location. Back when I was visiting my parents last March, I was able to visit their new site. The tables were cleaner, the benches not as rickety, but I was happy to find that they had still managed to stay true to their roots as a humble neighborhood watering hole.
Interestingly however, aside from its association with the humble Yul Cha Jip, bin dae dduk has otherwise always been associated with fancy holiday meals. As mung beans tend to fetch a rather a high price in Korea, bin dae dduk, especially those made with freshly ground mung beans, are considered something of a minor delicacy. And as my mother likes to stuff hers with a generous dose of pork and kim chi, I've always thought it was kind of a shame to just call it a side dish.
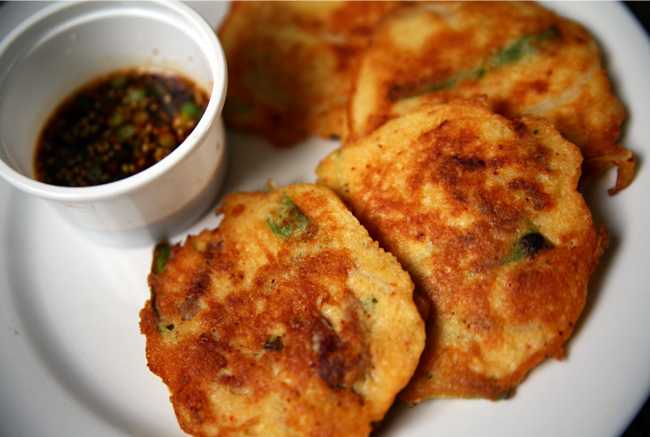
While it wasn't a conscious decision, I didn't look up any recipes online in preparation for making bin dae dduk. I instead worked off my memory, piecing together what I remembered seeing my mother do and following my gut instinct any time I drew a blank. In the end, both T and I were pleasantly surprised, especially at how crispy they turned out. Dare I say, I think even my mother would have been proud!
Korean Bin Dae Dduk
For Pancakes
2 c. peeled, split, and dried yellow mung beans
3 large eggs
1 medium onion, sliced into thin, lengthwise strips
4 green onions, sliced thinly into 2 inch strips
1/2 red pepper, sliced into thin, lengthwise strips of about 2 inch in length
1/2 lb. of pork, cut into 1/4 inch thick strips
1 1/2 c. kim chi, chopped
2 tsp. soy sauce
2 tsp. minced garlic
2 tsp. sesame oil
For Dipping Sauce
4 Tbsp. soy sauce
2 tsp. brown rice vinegar
1 tsp. sesame oil
1 tsp. of toasted seasme seeds
1 tsp. green onion, finely chopped
pinch of Korean red pepper flakes
1.) Rinse mung beans in a large bowl a few times. Then fill the bowl with water until the beans are completely submerged. Soak beans for at least half a day or overnight until they are bloated and slightly softened.
2.) Drain the mung beans and transfer to a food processor. Grind beans until they form a thick, smooth batter. If beans seem too dry, gradually add water one tsp. at a time until you reach the desired consistency.
3.) Transfer the beans into a large bowl. Break in eggs and stir mixture until they are well incorporated.
4.) Add all remaining ingredients and mix until you have an even distribution of ingredients throughout your batter.
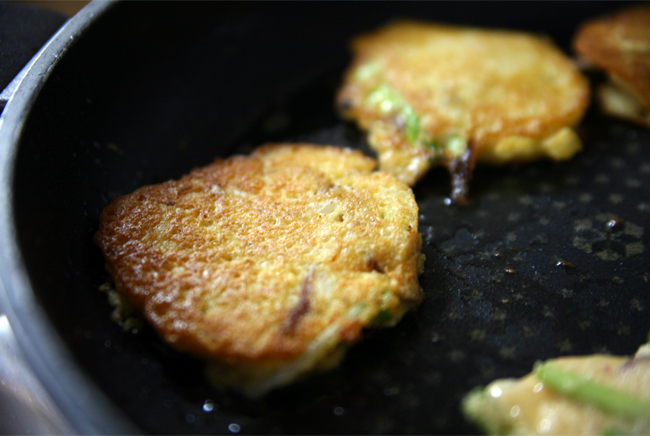
5.) Generously oil a frying pan with cooking oil and heat over medium to medium low heat.
6.) Spoon batter into frying pan and form pancakes of about 4-5inches in diameter. Cook until edges begin to brown and then flip with a spatula. When both sides of the pancake have turned golden brown, remove from the pan.
7.) To make the dipping sauce, combine all ingredients in a small bowl. Serve with pancakes while they are still hot!
Extra Tips:
* Be sure to add more oil to pan before starting a new pancake.
* Bin dae dduks freeze really well. Once they have been fried, allow them to cool down to room temperature. Wrap in plastic wrap or bag them up in a ziplock and freeze. When ready to eat, defrost and fry them up again in a pan until hot and cripsy.


They were as delicious to eat at they look in the photos!
ReplyDelete